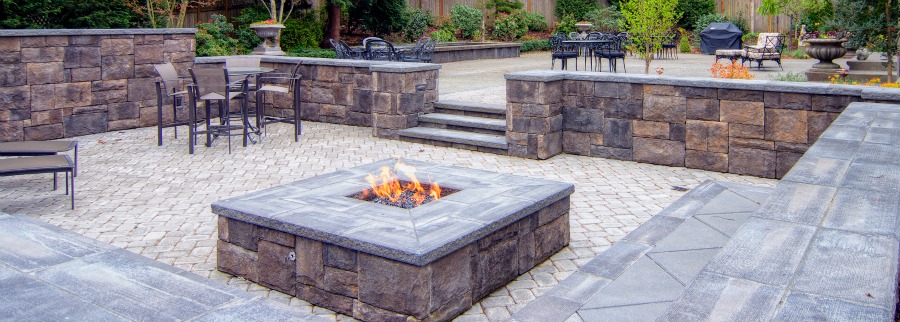
Extend the Outdoor Living Season

hardscapeMake an outdoor living area comfy long after the sun sets or the leaves turn with outdoor lighting, a patio heater, and a glowing firepit or portable fireplace.

With both lighting types, you can:

  • Light deck railings and stairs
  • Define the patio perimeter
  • Illuminate the edges of paths and walkways
  • Draw attention to a planter or tree

Other fixtures light up dining tables, grill surfaces, and even underwater in swimming pools.

Low-voltage fixtures clip onto a safe, 12-volt cable connected to a transformer, which plugs into a GFCI-protected 120-volt electrical outlet. A timer or light-sensitive control automatically turns lights on and off.

A low-voltage lighting kit with eight LED stainless steel fixtures, 50 feet of cable, and a transformer starts at $60. Individual low-voltage fixtures range in price from $7 for a simple poly-resin fixture up to about $150 for architectural-grade, cast-brass models.

Solar outdoor lighting fixtures don’t need cables and transformers. They simply turn themselves on automatically after dark. Each stand-alone fixture stakes into the ground or secures to a deck or exterior surface. You’ll save energy, as a sunlight-charged battery powers the bulb.

The downside to solar fixtures is a dimmer glow than low-voltage fixtures, and fewer lighting hours – many solar fixtures run out of stored energy after 4-5 hours on the job. Cloudy days also reduce power.

A four-pack of solar light fixtures that mount on top of deck posts starts at about $30. Or, check out a cast-aluminum solar lantern for about $60.

Get glowing with a firepit or portable fireplace

Bring a cozy glow and a stylish focal point to your outdoor living area with a firepit or portable fireplace. Irresistible for gathering, warming up, and roasting marshmallows, firepits and portable fireplaces come in a variety of materials, sizes, and styles. You’ll also find options for fueling your fire with wood, propane, gas, or gel cans.

Check local fire codes first to find out if your community allows the use of a firepit or portable fireplace on the patio or lawn. (Never use a fire feature on a wood deck.)

A firepit ($100-$500) is an open bowl, dish, or pan that varies in size from 24 inches across to about 40 inches. A firepit may come on a stand (some with wheels) or nestle into a tiled tabletop. Select a model with screening to contain flyaway sparks.

A portable fireplace ($100-$600) features a chimney to vent smoke up and away from people. Some portable fireplaces offer 360-degree views of the fire.

Warm up with a patio heater

Boost the warmth of your outdoor living area by as much as 15-25 degrees in the fall or spring with the addition of a portable patio heater. You’ll find three basic models:

  • Freestanding units resemble large floor lamps. Set them anywhere on your patio that will accommodates their 7-8 foot height. Some models include wheels for mobility. Expect to pay from $150 to $1,500, depending on heat output and fuel source.
  • A tabletop patio heater rests on a table, bench, or garden wall. These compact units typically produce less heat than tall, freestanding models. Prices range from $100 to $450.
  • Ceiling- or wall-mount patio heaters free up floor and table space, and typically emit heat via a halogen lamp. Prices vary from $175 to $1,500.

Make your selection based on how much outdoor living area you want to heat and whether you want a model powered by electricity or natural gas (each requiring a connection) or with a propane tank, which allows mobility.

As a rule of thumb, a 47,000 BTU propane-powered, floor-standing patio heater ($200) will heat an 18-foot diameter space. A 20-pound propane tank (about $36, plus $13 for fuel) offers about 10 hours of heating time.

Electric patio heaters use a quartz tube or halogen lamp that emits radiant heat. An infrared wall-mount electric patio heater ($450) equipped with a 1500-watt bulb heats a 9-foot area around the heater and uses about 14.4 kilowatts for a 10 hour period. At 8 cents per kilowatt for electricity, you spend about $1.15 to operate the unit for 10 hours.

By: Jan Soults Walker

How Paint Can Help (or Hurt) Your Home’s Value

A good exterior paint job adds value; a misguided one can make you weep — or LOL. Here’s a collection of our favorite oddballs.

Urban Jungle

crazy exterior

Friends and the pizza delivery guy won’t have any trouble finding your house when you tell them to look for the leopard spots. No matter what your color scheme, take care when prepping an older house for repainting by testing for lead paint and knowing current lead paint laws.

Credit: Libby Walker for HouseLogic

Flower Power

flower house

The prospect of brand-new siding for this 1907 house brought out a creative flurry in the homeowners, who spent a weekend festooning the old siding with little portraits of roses as a fond farewell to their 100-year-old exterior. Give your wood siding some TLC by inspecting, caulking, and trimming back shrubbery, and maybe it’ll last a century, too.

Credit: Brittany Powell

What Will the Neighbors Think?

race car exteriorir

Many of singer Chris Brown’s neighbors weren’t too happy with his decision to paint wild graffiti on the curbside wall of his Hollywood Hills home. Los Angeles city officials agreed, and fined the R&B star $376 for unpermitted signage. Before you get out the cans of spray paint, check your city ordinances and HOA rules about what’s allowed — and what isn’t.

Credit: Owen Beiny/WENN.com

Read the rest at HouseLogic

Killer Kitchen: Pattern and Color Splashes in Seattle

Despite its modern patterned floor and bright orange backsplash, this kitchen has some surprisingly traditional roots. Built in 1917, this Seattle home previously had only one owner, who had done minimal updates over the years. Although the clients didn’t want to keep the rusted metal cabinetry or barely functioning stove, they still wanted to honor the home’s history. Designer Laura Zecke used salvaged materials, dressed up the original floors and framed found art to combine the past with the present in this warm and beautiful design.

Killer kitchenLocation: Ballard neighborhood of Seattle, Washington
Size: 200 square feet

Killer kitchen 2The original kitchen had a massive 1950s-style stove, with the burners in a drawer. The clients weren’t able to salvage it, but they still wanted to honor the original kitchen in some way. During demolition, they found a bunch of old newspapers in the cabinets, and framed a few select clippings as wall art. The colors in the framed advertisement next to the stove inspired the bright orange of the new $3,000 Blue Star range and glass-painted backsplash.

The original fir floors have a beautiful honey color, but there were some very damaged sections. The homeowners liked the floor’s patina but wanted to distract from the ruined parts. After the first coat of finish, Zeck painted large stenciled sections onto the floor in the same light gray as the walls, then put on two more coats of finish.

See the entire kitchen on Houzz

How to Turn a Spare Closet Into a Home Office

closet office

A creatively used closet can serve many purposes in a home, and this closet-turned-workspace is one of the smartest (and coolest) uses we’ve seen. The DIY team at Family Handyman shows you how to build your own space-saving home office in this step-by-step tutorial.

Overview

In this tutorial, we’ll show you how to build and install wall shelf cabinets and a countertop and under-mount drawers, including how to adjust the dimensions to fit these projects in your closet. We’ll also show you an easy way to conceal all those cords that usually dangle down behind the desk. We’ve included a materials list, but you’ll have to adjust the quantities to fit your closet. The project shown here is constructed with birch plywood and boards and cost us about $400.

This is a great project for any intermediate to advanced DIYer. There’s no complicated joinery—the wall shelves and drawers are just wooden boxes that are screwed together. We used a table saw to cut the plywood, a narrow-crown staple gun to attach the shelf backs and drawer bottoms, and an 18-gauge nailer to attach the face frames. If you don’t have these tools, you can use a circular saw and straightedge guide to cut the plywood, and a good old-fashioned hammer and nails. It will just take a little longer.

Tools and Materials

  • Hammer
  • Miter saw
  • Narrow-crown staple gun
  • Tape measure
  • Circular saw
  • Drill/driver, cordless
  • Level
  • Impact driver
  • Framing square
  • Hearing protection
  • Hole saw kit
  • Hot melt glue gun
  • Safety glasses
  • Table saw
  • Wood glue

Step One: Measure Your Closet and Customize the Plan to Fit

Start by measuring the distance between the side walls. Keeping in mind that 32 in. is about the maximum width for a plywood shelf, decide how many shelf units you need. To figure out exactly how wide each cabinet should be, subtract 1-1/2 in. from the total measurement and divide the remainder by the number of cabinets. This will leave a 3/4-in. space between the cabinet and the wall at each end that you’ll cover with the face frame. This 3/4-in. space makes it easy to install the shelf cabinets in the closet without worrying about an exact fit.

We needed three 27-1/2-in.-wide cabinets to fit our 84-in.-wide closet. We built the cabinets 47-3/4 in. tall. If you have standard 8-ft.-tall walls, the cabinets will reach the ceiling. After you do the calculations, double-check your math by drawing lines on the closet wall. Draw a level line 28-1/2 in. from the floor to mark the bottom of the 1-1/2-in.-thick countertop. Then draw another line 47-1/2 in. from the floor for the bottom of the wall cabinets. Finally, draw vertical lines for the sides of the cabinets.

How to Turn a Spare Closet Into a Home Office

You’ll also have to decide how wide to make the drawers. You can use the technique we show here to build drawers in a size and configuration that will work best in your closet. The key is to build the frame and mount the drawer slides before you build the drawers. Then you can measure between the slides (photo 8) and build the drawers to fit.

Step Two: Mount the Countertop

The countertop is two layers of plywood that are glued and screwed together. It rests on cleats that are screwed to the wall studs. Start by measuring the closet interior at the level of the countertop. Use a framing square to check the corners. Deduct 1/4 in. from the length and depth to allow for the top to fit easily. You can cover any gaps with the backsplash. Transfer these measurements to your plywood and cut out the two pieces. Use less-expensive plywood for the bottom if you like. Screw 1×2 cleats to the back, side and front walls to support the top (Photo 1). Then drop the top into place and attach it from underneath with 2-1/2-in. screws (Photo 2). Finish the front edge with a 2-1/4-in.-wide board (Photo 3).

How to Turn a Spare Closet Into a Home Office

Photo 1: Draw level lines for the bottom of the countertop and cabinets. Draw vertical lines to indicated the sides of the cabinets. Then screw countertop supports to the studs at the back and sides of the closet.

How to Turn a Spare Closet Into a Home Office

Photo 2: Screw through the countertop supports into the countertop. Lay something heavy on top, or ask a helper to press down while you drive the screws.

How to Turn a Spare Closet Into a Home Office

Photo 3: Glue and nail a board to the front to cover the plywood and add strength. Wipe off glue squeeze-out with a damp rag.

Step Three: Build the Wall Shelf Cabinets

Start by cutting the parts from the 4 x 8-ft. sheets of plywood. If you’re using a table saw, keep the good side of the plywood facing up as you cut the parts. If you’re using a circular saw, face the good side down so that any splintering or chipping won’t show. We think it’s easier to finish the parts before you assemble them.

It’s also easier to install the shelf standards to the cabinet sides before you put the cabinet together. Make sure the shelf standards are oriented the right way. We put a piece of masking tape on the top of each side to keep track. Here’s a building tip you can use for the cabinet and drawer boxes: Nail the cabinet sides to the top and bottom before you drill pilot holes for the screws. The nails hold the parts in perfect alignment while you drill the holes and drive the 1-5/8-in. screws. Screw the sides to the top and bottom (Photo 4). Then nail on the back. If you were careful to cut the 1/4-in. plywood back accurately, you can square the cabinet by aligning it with the back before nailing it on (Photo 5). You’ll cover the front edge of the cabinets with a wood face frame after they’re mounted (Photo 7). Finish the front edge of the plywood shelves with iron-on edge banding. See this article for complete instructions on installing edge banding.

Start the cabinet installation by screwing a 1×2 ledger to the wall to support the wall cabinets. Align the top edge of the board with the 47-1/2-in.-high level line and drive a screw at each stud location. Next, measure from the vertical lines to the center of the wall studs, and transfer these measurements to the hanging strip at the top of each wall cabinet so you’ll know where to drive the cabinet installation screws. Hang the cabinets by resting the bottom edge on the ledger, tipping them up against the wall, and driving 3-in. screws through the hanging strip into the studs (Photo 6). Secure the bottom of the cabinets by driving a nail or screw down into the ledger. Connect the fronts of the cabinets by hiding 1-1/4-in. screws under the shelf standards. Complete the installation by nailing on the face frames (Photo 7). We used a 1×3 for the bottom face frame to hide the under-cabinet lighting.

How to Turn a Spare Closet Into a Home Office

Photo 4: Mount shelf standards on the cabinet sides before assembly. Then screw the sides to the bottom top with 1-5/8-in. screws. Drill pilot holes to prevent the plywood from splitting.

How to Turn a Spare Closet Into a Home Office

Photo 5: Use the plywood back as a guide for squaring the cabinet. Apply a bead of glue. Then nail one edge of the plywood back to the cabinet side. Then adjust the cabinet box as needed to align the remaining edges and nail these.

How to Turn a Spare Closet Into a Home Office

Photo 6: Rest the bottom of the cabinets on the ledger and tilt the cabinet up. Drive 3-in. screws through the hanging strip at the top of the cabinet into the studs.

How to Turn a Spare Closet Into a Home Office

Photo 7: Nail a 1×3 to the lower cabinet edge to create a valance for the under-cabinet lighting. Nail 1x2s to the cabinet top and sies to cover the raw plywood edges.

Step Four: Build the Drawers

You can buy drawer slides that mount directly to the underside of a desk or countertop, but we’ll show you another method that allows you to use high-quality, side-mounted drawer slides. We bought these full-extension ball-bearing slides at the local home center. They cost about $15 per drawer. But you can substitute less-expensive epoxy-coated slides to save some money. You’ll have to measure your closet to figure out the drawer sizes. Just make sure the drawers clear the open closet doors.

Building the drawer support frame is straightforward. Start by laying two of the stringers side by side and marking the location of the drawer dividers on them. Ball-bearing slides are not very forgiving, so measure and attach the drawer dividers carefully so the dividers are perfectly parallel when the frame is assembled.

For our 24-in.-deep countertop, we used 20-in. drawer slides. We cut the drawer dividers 20 in. long and built the drawer boxes 20 in. deep. If your closet is shallower, use shorter slides and adjust these dimensions to match. The drawer slides have two parts. One mounts to the dividers and the other to the drawer. Remove the part that attaches to the drawer according to the included instructions. Then screw the part of the slide with the ball bearings to the dividers, aligning the bottom edges. The center dividers will have drawer slides on both sides. Screw through the stringers into the drawer dividers to build the frame. Be careful to keep the front of the drawer slides facing forward. Then add the second layer of stringers. Check the frame against a framing square as you screw it together to make sure it’s square. When the frame is complete, measure between the slides to determine the drawer sizes (Photo 8).

Build the drawers by screwing through the sides into the fronts and backs, and then gluing and nailing on the plywood bottom. Nail one edge of the bottom to the drawer box. Then use a framing square to square the drawer box before nailing the other three edges. To attach the drawer slide to the drawers, we first drew lines 1-7/8 in. down from the top edges of the drawers (Photo 9). You may have to adjust this distance to match your drawer slides. The dimension isn’t critical as long as there’s about a 1/4-in. clearance between the drawer and the stringer when the drawer is mounted. Then sight through the screw holes in the slides to center them on the line before attaching them with the included screws.

Finish the drawer installation by attaching the frame to the underside of the countertop (Photo 10) and installing the fronts. Hold the drawer frame back 3/4 in. from the back of the countertop edging. Install the drawers by lining up the slides and pushing them in. Photo 11 shows a tip for aligning the drawer fronts. The hot-melt glue holds the fronts temporarily. Attach them permanently by opening the drawers and driving four 1-1/4-in. screws through the drawer box into the drawer front from the inside.

How to Turn a Spare Closet Into a Home Office

Photo 8: Make sure your drawers fit perfectly by building the drawer frame first. Then measure between the slides and build your drawers exactly this width.

How to Turn a Spare Closet Into a Home Office

Photo 9: Draw a line parallel to the top of the drawer to indicate the center of the drawer slide. Line up the slide by centering the line in screw holes. Attach the slide with the screws provided.

How to Turn a Spare Closet Into a Home Office

Photo 10: Make center marks on the frame and the underside of the counter and align them. Then use a spacer to set the frame 3/4 in. back from the countertop edging and drive the screws.

How to Turn a Spare Closet Into a Home Office

Photo 11: Starting with the center drawer front, dab on hotmelt glue and press it against the drawer. Quickly center the drawer front 1/4 in. below the countertop edge. Hold it still for about 10 seconds until the glue cools. Now position the other two drawer fronts. Drive screws from the inside.

Step Five: Finish it Off With a Cord-Concealing Backsplash

Here’s a handy method to hide cords and still have easy access to them: simply mount a backsplash board about 4 in. from the back wall to create a cord trough. Drill holes through the face and install cord grommets to allow cords to pass through. We found 2-in. cord grommets at the home center, but since they were a loose fit in the 2-in. hole, we held them in place with a dab of silicone caulk. Lay a multi-outlet power strip behind the backsplash for extra outlets. We drilled a hole through the countertop so that we could plug the power strip into a wall outlet. You can also nail backsplash boards to the end walls for a more finished look.

How to Turn a Spare Closet Into a Home Office

Photo 12: Attach the backsplash with cleats, holding it about 4 in. from the wall. Then drill holes where you’ll have cords and install cord grommets.

A Note on Lighting

We’re not showing how to wire your closet office here, but chances are you’ll want to add at least one electrical outlet and possibly cable, phone, or network wiring. We’ve got tons of how-to information to help you add an electrical outlet. Keep in mind that the new National Electrical Code requires that closet outlets be arc fault protected. This means you’ll have to either connect to or add a circuit that’s protected by an arc fault circuit interrupter (AFCI). While you’re adding wiring, check out this article on adding a light.

How to Turn a Closet Into an Office | The Family Handyman

5 Deck Makeover Projects Under $300

Want to upgrade your deck but watching your budget? Here are 5 easy deck makeover ideas, many well under $300.

You won’t have to plug them in or wire anything, either. Their solar-charged batteries are renewed every day, and the lights are built to withstand all kinds of weather.

Types and cost:

  • Paper lanterns (made from synthetic, weatherproof nylon; $20-$30) are made for hanging and come in all sorts of fun shapes, sizes, and colors.
  • Carriage lights can be fixed on top of a pillar or railing newel post. $45-$150.
  • Solar illuminated replicas of old-fashioned mason jars can be set on any flat surface, about $35.
  • Rope lights have small LED bulbs inside a flexible cord. A 25-foot-long rope with solar charger and stand is $25.

What else: Suspend lanterns from overhead trellises, railings, and nearby trees, where they’ll shed a soft, colorful glow. Wind rope lights around rafters and railings.

2. Install a stone landing at the foot of your deck stairs
3. Put up a privacy screen
4. Paint a faux floor rug on your decking
5. Wash and refinish your wood decking

2. Install a stone landing at the foot of your deck stairs

Dress up the transition from your deck to your yard with a little hardscaping — a stone landing at the bottom of your deck stairs. Stones are a natural compliment to wood decks, and they’ll help prevent mud from forming where there’s heavy foot traffic.

Cost: Flagstone is priced by the pound; you’ll spend $60-$100 for enough stone for a 3-by-4-foot landing.

How-to: Techniques for installing a landing are the same as putting in a patio, although you’ll have to temporarily support your existing stairway while you work around — and under — it.

What else: You should be able to add a landing in less than a day. It’ll get done faster if you hire a pro, but it’ll cost you another $150-$200 in labor.

3. Put up a privacy screen

Whether you’re relaxing alone au naturel or entertaining friends, a little home privacy is always welcome. You can add some vertical supports and fill in a variety of cool screening materials that are as nice for your neighbors to look at as they are for you.

Types and costs:

  • Bamboo fencing comes in a 6-by-16-foot roll for $20-$25.
  • Lattice panels are either wood or plastic, $15-$30 for a 4-by-8-foot panel.
  • Grow climbing plants on a trellis ($20-$100) to create a living privacy screen. Plant climbing vines in tall containers ($40-$120) to raise them above the deck surface and give them a head start filling in your screen.
  • Outdoor fabric resists moisture and fading; $12-$120 per yard. You’ll pay another $20 to have a seamstress cut and hem a 3-by-5-foot panel.

How-to: Your privacy screen should integrate with your deck; make the framework using the same basic materials as your deck railing and structure.
[pb_vidembed title=”” caption=”” url=”http://www.youtube.com/watch?v=zBWuHbRWgpc” type=”yt” w=”680″ h=”385″]

Add some flash by building a frame with 2-by-2- or 2-by-4-inch uprights spaced 1 foot apart, then weaving aluminum flashing between the uprights.

[pb_vidembed title=”” caption=”” url=”http://www.youtube.com/watch?v=1WDvRYAl3nE” type=”yt” w=”680″ h=”385″]

What else: Make sure to position your privacy screen where you’ll get maximum benefit. Sit on your deck and check your lines of sight.

4. Paint a faux floor rug on your decking

Punch up a boring old deck with a faux rug. This is a fairly low-cost project with a big wow factor, and one you can share making with your (well-behaved) kids. It works best on a newly cleaned deck (see below.)

Cost: Most of your cost will be deck stain or paint in various colors. Because you won’t be using that much stain per color, you can buy quarts. Figure $15-$20 per quart.

How-to: Figure out a size, sketch out the design on your decking, and then all you have to do is paint or stain between the lines. You can use painter’s tape as a guide, but a little leakage is likely on a wood decking surface.

[pb_vidembed title=”” caption=”” url=”http://www.youtube.com/watch?v=e2JDw09zr2c” type=”yt” w=”680″ h=”385″]

What else: Keep a few basic cleaning supplies on hand for any drips or spills. After the stain is dry, coat the entire deck with a clear deck sealer.

5. Wash and refinish your wood decking

The ultimate deck makeover is none other than a good cleaning. Applying a coat of deck sealant afterwards ensures your wood decking looks great and will last for decades.

Cost: There are many brands of deck cleaning and brightening solutions. Some require the deck to be wet; others need the decking to be dry. Some are harmful to plants and you’ll have to use plastic sheeting to protect your landscaping. Consult the instructions carefully.

You’ll pay $15-$25 per gallon, enough to clean 300 sq. ft. of decking.

How-to: Scrubbing with a good cleaning solution and rinsing with a garden hose is more foolproof than scouring your decking with a power washer that may damage the surface of the wood.

[pb_vidembed title=”” caption=”” url=”http://www.youtube.com/watch?v=FqrR37PvqHE” type=”yt” w=”680″ h=”385″]
What else: After you deck is cleaned, apply a coat of deck stain or clear finish. The sealer wards off dirt, wear, and UV rays, and helps prevent deck splinters. A gallon covers 250-350 sq. ft., $20-$35/gal.

By: John Riha

Home Energy Savings

70% of electricity in the US is generated from non-renewable sources.  The Home Energy Savings infographic provided by Accent Building Products tells us how to have an energy efficient home without sacrificing comfort.

Today it is more important than ever to make our homes more energy efficient without sacrificing home comfort. An energy-efficient home will keep your family comfortable while saving you money. Unfortunately, a lot of energy is wasted through leaky windows or ducts, old appliances, or inefficient heating and cooling systems. You can use many tips to save money and energy! This infographic details many different money saving tips and shows how we spend the money on our homes.

Infographic provided by Accent Building Products, a direct distributor of the industry’s top accent home and building products.  All products are shipped to you directly from the manufacturers’ factory.

This is a fun visual explanation design.  The illustrations clearly put the suggestions and data into context of the areas in the house.  There is a lot of text, but the small callouts make it easy to read.  It would have been more effective to visualize the pieces of data that are included in the design.

Home-Energy-Savings

Saving Money With Green Updates [Infographic]

Granted, the dollars are in pounds, but you get the point…Saving-Money-with-Green-Upgrades

Source: http://www.moneysupermarket.com/loans/infographics/saving-money-with-green-upgrades/

The Advantages of Engineered Wood Flooring

Rise_of_Engineered_Wood

When It Comes to Wood Floors, Choose Wisely

hardwood-kitchenRich wood flooring can spell instant warmth and patina in a home. Here’s an overview that can help buyers and sellers evaluate wood floors.

Just as with ties and hem lengths, wood flooring styles change. Colors get darker or lighter; planks get narrower or wider; woods with more or less grain show swings in popularity; softer or harder species gain or lose fans; and the wood itself may be older, newer, or even pre-engineered with a top layer or veneer-glued to a substrate to decrease expansion and contraction from moisture.

Here are key categories for consideration:

Solid Plank

This is what some refer to as “real” wood because the wood usually ranges from three-eighths to three-quarters of an inch in total thickness to permit refinishing and sanding. Thicker floors have a thicker wear layer to allow for more frequent refinishing and sanding, so they can withstand decades of use, says architect Julie Hacker of Stuart Cohen and Julie Hacker Architects. It also can be stained, come from different species of tree, and be sold in numerous widths and lengths:

  • Width and length: Designer Steven Gurowitz, owner of Interiors by Steven G., is among those who prefers solid flooring for many installations because of its rich, warm look. Like other design professionals, he’s seeing greater interest in boards wider than the once-standard 2 ¾ to 3 ¾ inches — typically 5 to 6 inches now but even beyond 10 inches. And he’s also seeing corresponding interest in longer lengths, depending on the species. Width and length should be in proportion. “The wider a board gets, the longer the planks need to be, too, and in proportion,” says Chris Sy, vice president with Carlisle Wide Plank Floors. These oversized dimensions reflect the same trend toward bigger stone and ceramic slabs. The downside is greater cost.
  • Palette: Gurowitz and others are also hearing more requests for darker hues among clients in the northeastern United States, while those in the South and West still gravitate toward lighter colors. But Sprigg Lynn, on the board of the National Wood Flooring Association and with Universal Floors, says the hottest trend is toward a gray or driftwood. Handscraped, antique boards that look aged and have texture, sometimes beveled edges, are also become more popular, even in modern interiors, though they may cost much more.
  • Species and price: Depending on the preference of the stain color, Gurowitz favors mostly mahogany, hickory, walnut, oak, and pine boards. Oak may be the industry’s bread and butter because of the ease of staining it and a relatively low price point. A basic 2 ¼-inch red oak might, for instance, run $6.50 a square foot while a 2 ¼-inch red oak that’s rift and quartered might sell for a slightly higher $8.50 a square foot.
  • Maintenance: How much care home owners want to invest in their floors should also factor in their decision. Pine is quite soft and will show more wear than a harder wood like mahogany or walnut, but it’s less expensive. In certain regions such as the South, pine comes in a harder version known as heart pine that’s popular, says Georgia-based designer Mary Lafevers of Inscape Design Studio. Home owners should understand the different choices because they affect how often they need to refinish the wood, which could be every four to five years, says Susan Brunstrum of Sweet Peas Design-Inspired Interior. Also, Sy says that solid planks can be installed over radiant heating, but they demand expert installation.

Engineered Wood

Also referred to as prefabricated wood, this genre has become popular because the top layer or veneer is glued to wood beneath to reduce expansion and contraction that happens with solid boards due to climatic effects, says Sy, whose firm sells both types. He recommends engineered, depending on the amount of humidity. If home owners go with a prefabricated floor, he advises a veneer of at least one-quarter inch. “If it’s too thin, you won’t have enough surface to sand,” he says. And he suggests a thick enough substrate for a stable underlayment that won’t move as moisture levels in a home shift.

His company’s offerings include an 11-ply marine-grade birch. The myth that engineered boards only come prestained is untrue. “They can be bought unfinished,” he says. Engineered boards are also a good choice for home owners planning to age in place, since there are fewer gaps between boards for a stable surface, says Aaron D. Murphy, an architect with ADM Architecture Inc. and a certified Aging in Place specialist with the National Association of Home Builders.

Reclaimed Wood

Typically defined as recycled wood — perhaps from an old barn or factory — reclaimed wood has gained fans because of its aged, imperfect patina and sustainability; you’re reusing something rather than cutting down more trees. Though less plentiful and more expensive because of the time required to locate and renew samples, it offers a solid surface underfoot since it’s from old-growth trees, says Lynn. Some companies have come to specialize in rescuing logs that have been underwater for decades, even a century. West Branch Heritage Timber,for instance, removes “forgotten” native pine and spruce from swamps, cuts them to desired widths and lengths, and lays them atop ½-inch birch to combine the best of engineered and reclaimed. “The advantage is that it can be resanded after wear since it’s thicker than most prefabricated floors, can be laid atop radiant mats, and doesn’t include toxins,” Managing Partner Tom Shafer says. A downside is a higher price of about $12 to $17 a square foot.

Porcelain “Wood”

A new competitor that closely resembles wood, Gurowitz says porcelain wood offers advantages: indestructibility, varied colors, “graining” that mimics old wood, wide and long lengths, quickness in installation, and no maintenance. “You can spill red wine on it and nothing happens; if there’s a leak in an apartment above, it won’t be destroyed,” he says. Average prices run an affordable $3.50 to $8 a square foot. The biggest downside? It doesn’t feel like wood since it’s colder to the touch, Lynn says.

Bottom Line

When home owners are making a choice or comparing floors, Sy suggests they ask these questions:

1. Do you want engineered or solid-based floors, depending on your home’s conditions?

2. Do you want a floor with more natural character, or less?

3. What board width do you want?

4. How critical is length to you in reducing the overall number of seams?

5. What color range do you want — light, medium, or dark?

6. Do you want more aggressive graining like oak or a mellower grain like walnut?

7. Do you want flooring prefinished or unfinished?

8. How thick is the wear layer in the floor you’re considering, which will affect your ability to refinish it over time?

9. What type of finish are you going to use? Can it be refinished and, if so, how?

10. For wider planks that provide greater stability: Where is the wood coming from, how is it dried, what is its moisture content, and what type of substrate is used in the engineered platform?