
Why Do I Want to Build a Sawhorse?
Good question. Sawhorses come in handy in a variety of situations. The first and most obvious situation where a sawhorse is useful is when you need to saw something. Duh. A sawhorse gives the board you’re sawing the support and elevation you need to make a clean cut.
A pair of sawhorses can also be used to make a makeshift work table or scaffold. Just use the two sawhorses as the legs, and place a sheet of plywood over it. When I worked as a painter one summer back in high school, my boss would use a pair of sawhorses and an old door he found on the side of the road to make his worktable. Makeshift tables from sawhorses particularly come in handy when you’re setting up for a garage sale.
Let’s see. Other reasons you should build a sawhorse… How about for a makeshift seesaw? Or what about using it as the fulcrum for a home defense catapult? Just spitballin’ here.
And while you can certainly buy ready-made sawhorses at your local big box hardware store, you miss out on the fun and satisfaction of building a piece of equipment that will serve you for years to come.
Materials
Here are the materials Tim recommends for his sawhorses. It’s enough to make a pair.
- Six 32½-inch 2x4s (for the I-beams)
- Eight 30-inch 2x4s (for the legs)
- Twelve 3-inch wood screws
- Thirty-two 16D galvanized nails
How to Build a Sawhorse
Building a sawhorse is super easy. It makes for a great starter project for the man who has never really worked with tools, but wants to become handier around the home.
Note: This is one way to build a sawhorse. I know there are plenty of other ways to do it. This plan is great for everyday use in a typical suburban garage. If you plan on using your sawhorses for heavy work, you might try another design.
1. Measure and Cut Your Timber
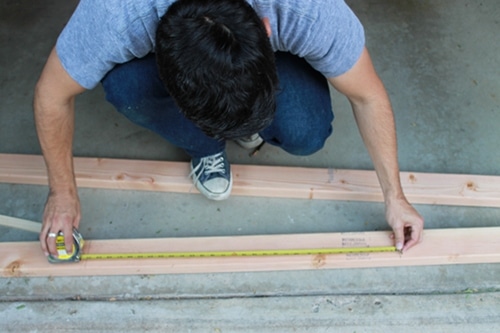
The 2x4s I bought came in lengths of sixteen feet, so I had to cut them down to the needed sizes. Here I am measuring and cutting 32½-inch pieces for the I-beams and 30-inch pieces for the legs. Remember to measure twice and cut once!
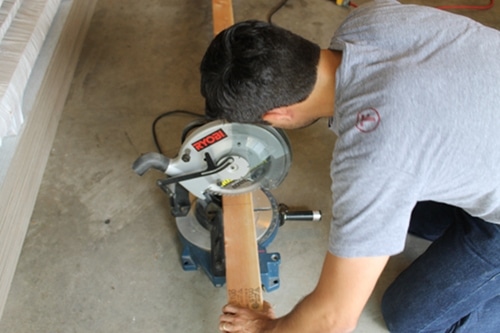
Here I am using a portable compound miter saw to cut the timber. You can use a hand-held circular saw or even an old-school handsaw.
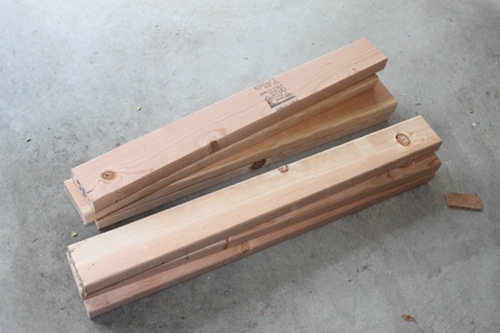
Ready to be turned into a sawhorse
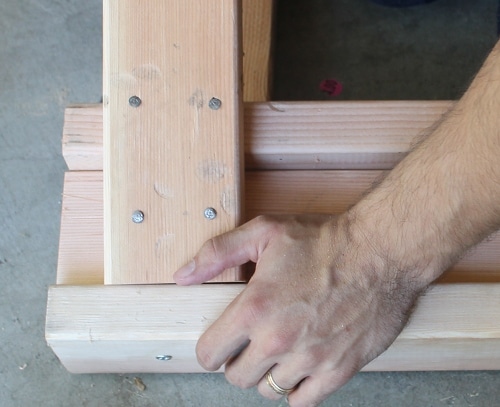
2. Build I-Beams
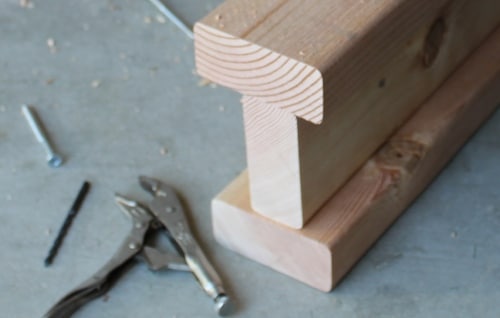
Take three of your 32½-inch 2x4s and screw them together in an "I" formation.
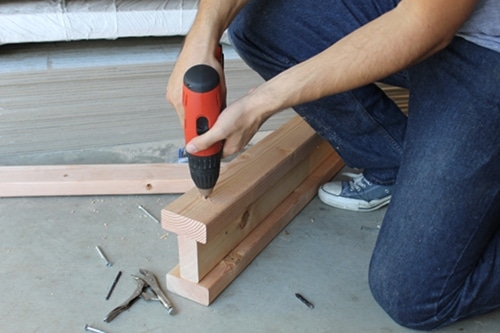
I found it helpful to drill a pilot hole before driving the screws in.
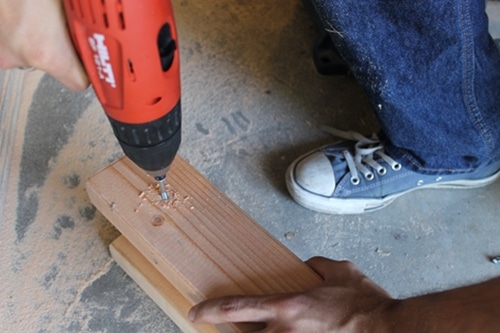
Drive three wood screws right down the middle on top and bottom of the I-beam. Place two of the screws near each end and drive the other one right in the middle of the I-beam.
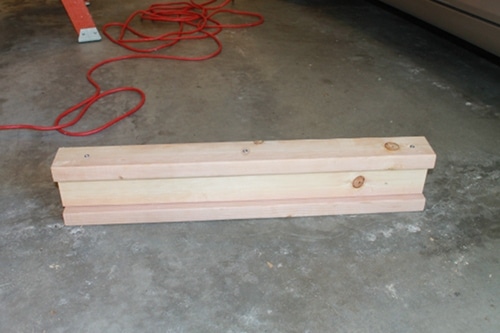
Finished I-Beam
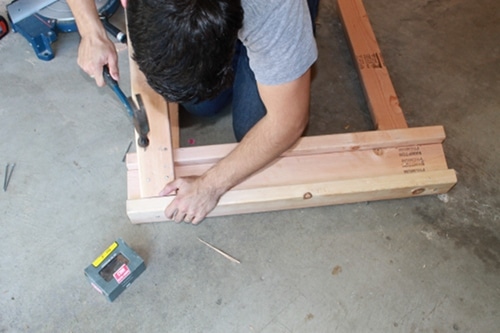
3. Nail the Legs to I-Beam
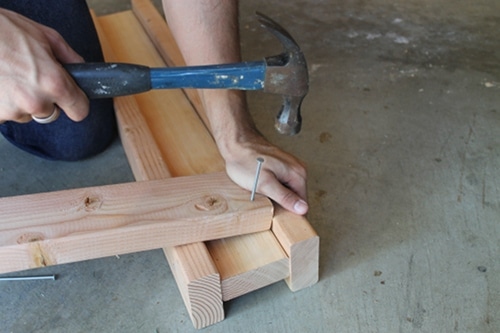
Butt the end of the 30" 2x4s into the top of the I-beam like so. Hammer two nails at the top of the leg so that they go into the middle I-beam piece.
Nail two more nails into your leg so that they go through the bottom I-beam piece.
If you’ve done things correctly, you should form a box pattern with your nails. Notice my hammer dings in the wood. I need to practice.
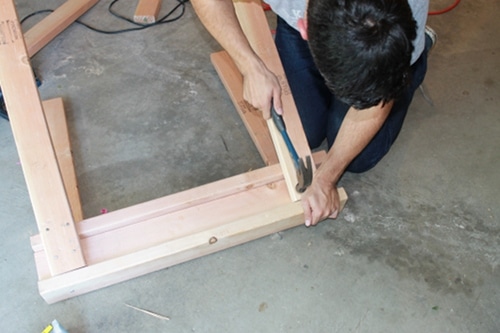
Repeat for each leg.
Completed Sawhorse
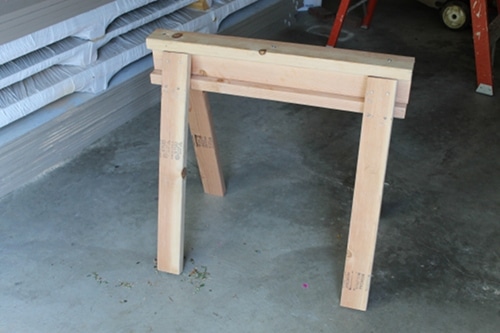
My finished sawhorse. Rinse, wash, and repeat to make your second sawhorse for a pair. To store these bad boys, just stack ’em.
Speak Your Mind